⚡Quick Summary
Products → Manage products lists every product. Search, filter, expand variants to edit price and stock, run bulk actions, and import or export CSV files from the same page.
Overview
The Manage products page shows every product in your store, whatever the vendor. Merchants see all products and extra controls. Vendors see their own. Find, filter, and update products from one page.
1. Open the page
Path:
1. Products → Manage products
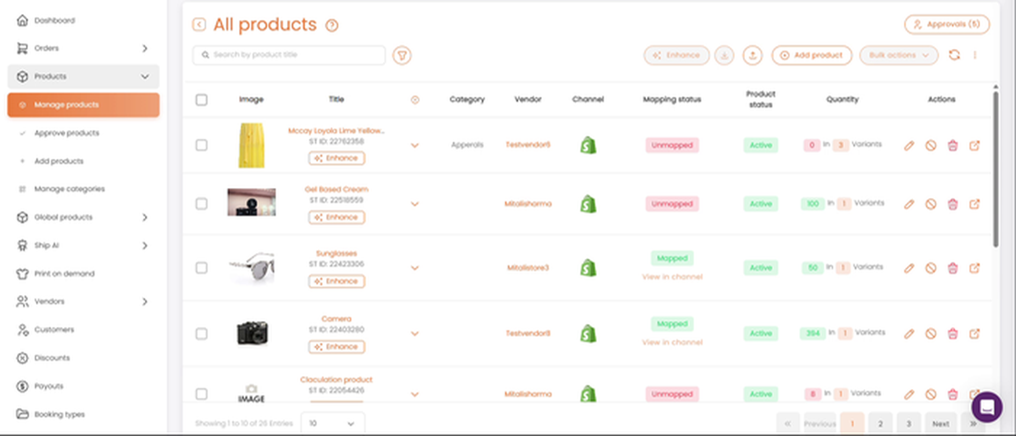
Products → Manage products: All products list
2. Read the list
Each row shows:
- Title — name, ST ID, and an Enhance button (add-on, see Ship AI (Add-On)).
- Category and Vendor.
- Channel — green means synced to Shopify.
- Mapping status — Mapped (linked to a Shopify product) or Unmapped (not linked yet; not on the storefront).
- Product status — Active, Draft, or Archived.
- Quantity — stock and variant count.
- Actions — edit, disable, delete, open in Shopify.
Top bar
- Enhance with AI (Add-on) — AI-writes titles and descriptions for selected products. Requires the Ship AI add-on. See Ship AI (Add-On).
- ↓ / ↑ — export or import CSV.
- Add product — create a product.
- Bulk actions — act on selected products.
- ↺ — reload the list.
- Approvals — pending vendor submissions (merchants only). See Product Approval Process.
3. Search and filter
Search by product title, or select the filter icon. Filters can be combined. Select Reset to clear them.
- Dates — Date created, Date published
- Product — Title, SKU, Category, Vendor
- Status — Mapping status, Product status, Quantity status, HSN status
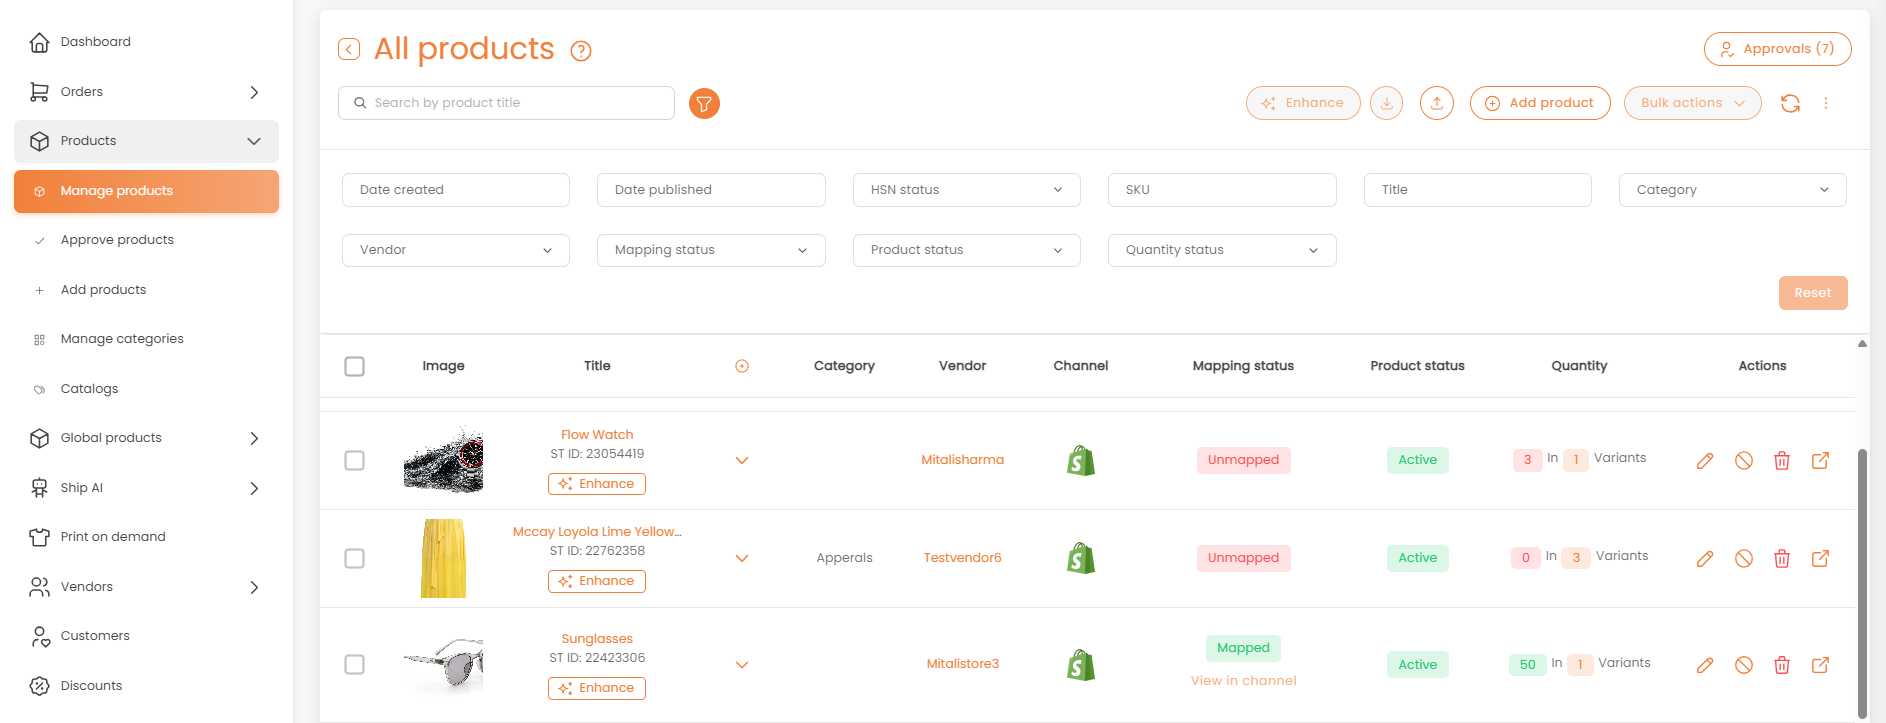
Filter panel with all available fields
4. Edit price and stock in the list
- Select ▼ on a product row to show its variants.
- Select the pen next to Price or Quantity → edit → save.
- Select the edit icon on a variant for the full editor (inventory, pricing, dimensions, commission).
- Select ▲ to collapse.
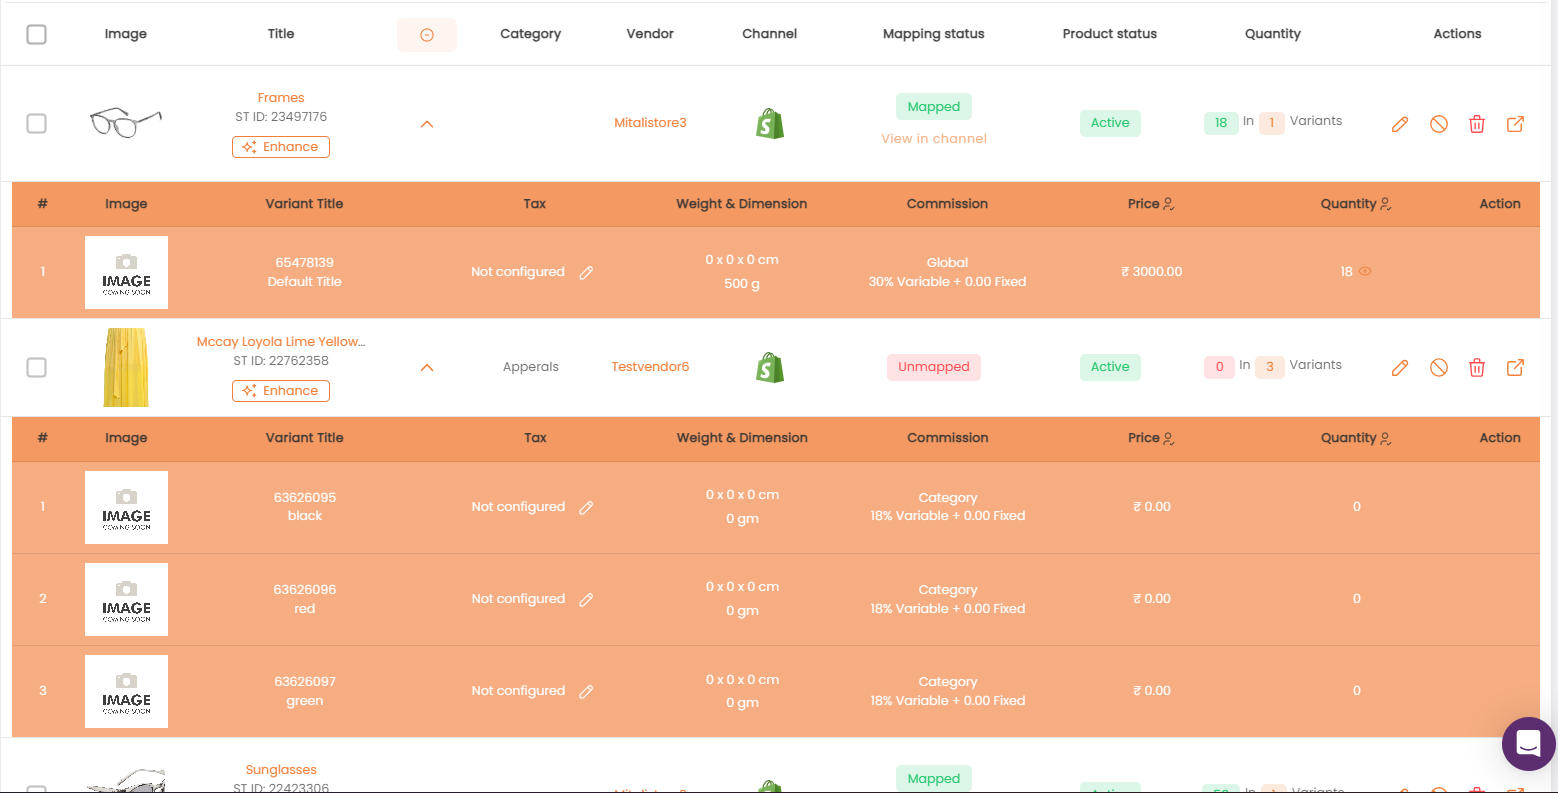
Variants expanded inline
5. Bulk actions
Tick products (or the header box for the whole page), then select Bulk actions:
- Set as Active / Draft / Archived
- Delete Product — permanent.
- Add Labels
- Import Inventory from SFTP / Export Variants to SFTP
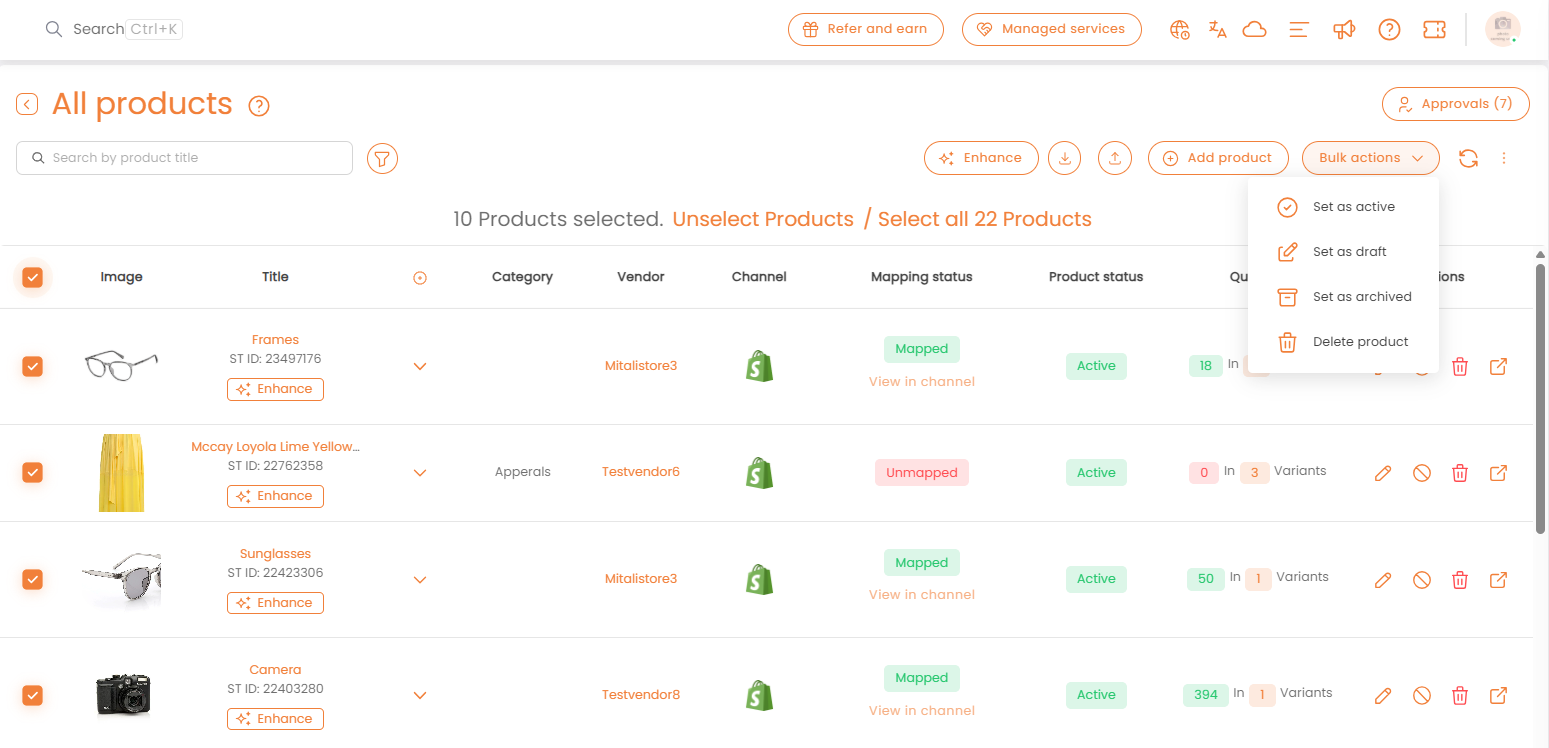
Products selected: Bulk actions available
Bulk import and export
Use CSV files to add or update many products at once.
- Export: select ↓ to download all products and variants.
- Import: select ↑. The Import products and variants window opens.
- Choose what you want to do (see below).
- Select New product template to download a blank CSV. Fill it in following the template's instructions, then save the file.
- Drop the file on the upload area, or select Browse.
- Review the Confirm import dialog → Confirm to upload the products.
- To check past imports, select View upload history.
Add new products — create new listings. Start from the New product template.
Edit products — update title, description, category, and other product data.
Edit variants — update price, quantity, SKU, and other variant data only.
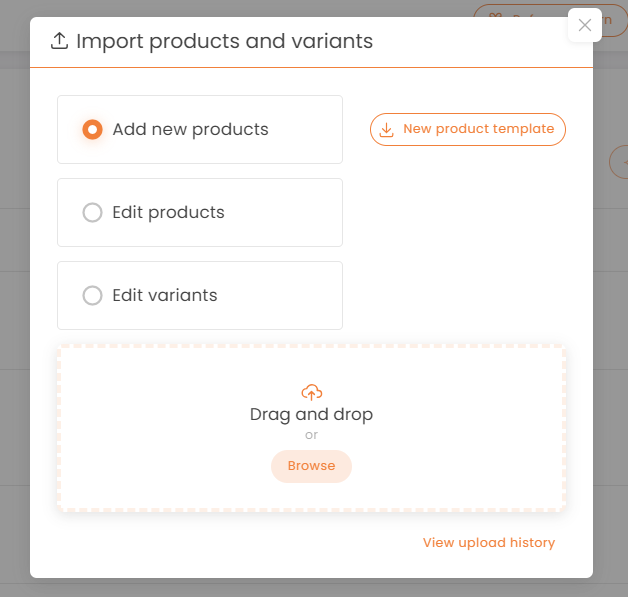
Import products and variants window: import type, template download, and upload area
6. More options (⋮)
- Trash — Manages deleted products and stores by retaining them for 14 days before permanently deleting them.
- Manage categories — Redirects you to Manage Categories page.
- Manage product templates — Redirectls you to Manage Product Template Page.
- Tax mapping — Redirects you to HSN-Tax % Mapping Page.
- Files uploaded earlier — Import history and past exports.
- Organize columns — Show, hide, and reorder columns.
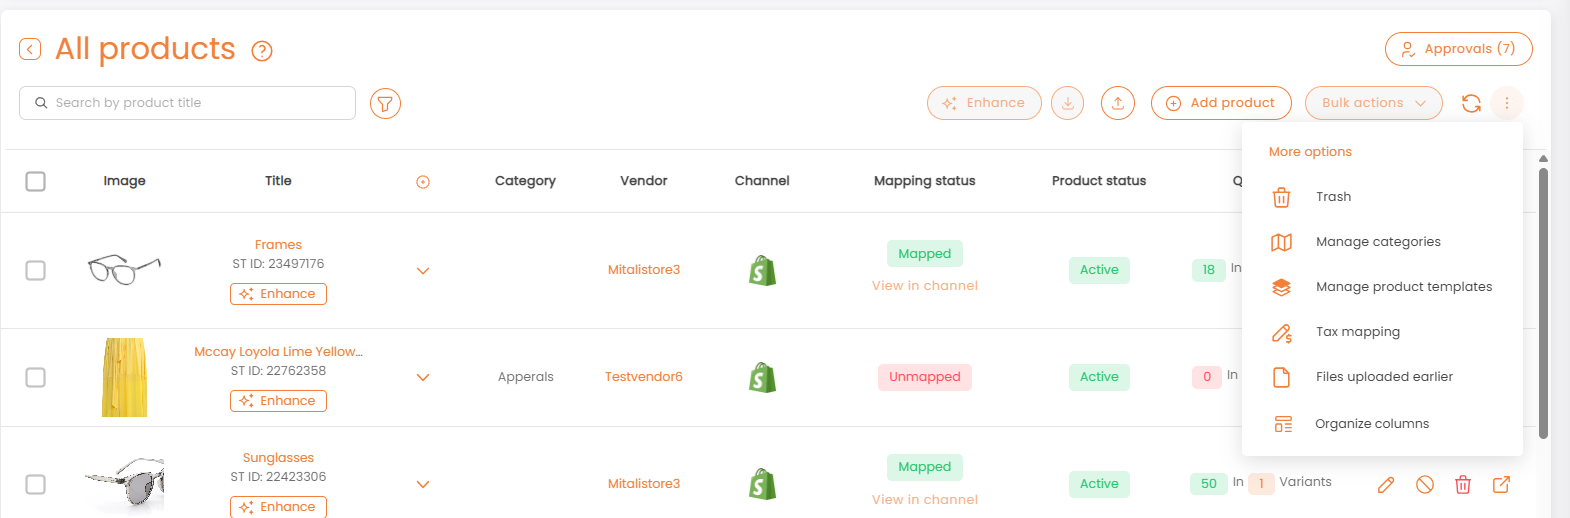
More options menu
7. Merchant vs. vendor access
- Vendors — view and edit their own products, variants, price, and stock; import and export.
- Merchants — everything vendors can do, for all vendors, plus approvals, field permissions, categories, templates, tax mapping, restore, and column settings.
For more information, see Product Approval Process
FAQs & Troubleshooting
- Mapped vs. Unmapped?
Mapped products are linked to a Shopify product and sync both ways. Unmapped products exist only in Shipturtle and won't show on the storefront until mapped or pushed to Shopify. - How do I hide a column?
⋮ → Organize columns. Your choice is saved. - How do I restore a deleted product?
⋮ → Restore deleted products → select → confirm. - The list is empty but products exist in Shopify.
Select ↺. If still empty, check that the Shipturtle app is installed and the Shopify connection is active under Settings → Integrations. - Bulk actions is greyed out.
Tick at least one product. - The Approvals count didn't update.
Select ↺ to reload. - The import dialog lists invalid fields.
Those CSV columns don't match the template. Rename or remove them and upload again. If you confirm anyway, unrecognised columns are ignored.
Related Articles
Need Help?
If you're stuck, contact the Shipturtle support team at team@shipturtle.com or raise a support ticket through the Shipturtle support page.