This article covers two things: customizing editable notification templates, and configuring how your marketplace's emails are sent, using your own domain and mail server instead of a generic sender address.
Who this is for
Merchant: Manages notification templates and configures the sending domain/mail server.
Vendor: Receives notifications; not involved in setup.
Customer: Receives notifications; not involved in setup.
Notification Templates
Notification templates control the content of automated emails, order confirmations, delivery updates, return notices, and more, sent to vendors and customers. Not every template is editable, some remain system-controlled, but most can be customized to match your marketplace's tone and branding.
Where to find them
Go to Settings → Integrations → Email configuration → Notification templates. Templates are organized in a left-pane navigation by category: Orders, Products, Payouts, Shipping & Logistics, Vendors, User, Reconciliation, Messages & Chat, Digest, and Booking.
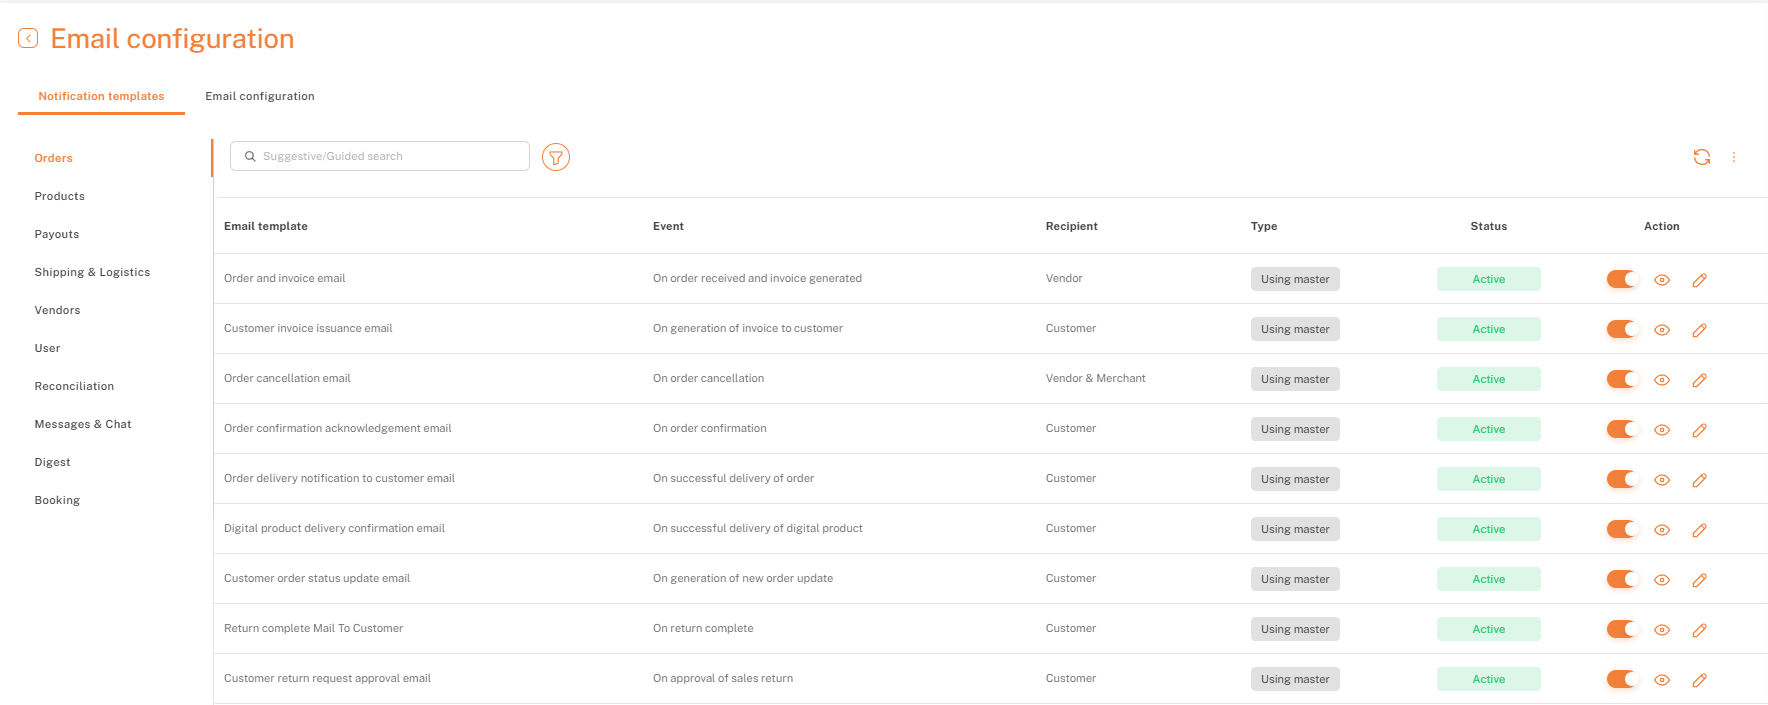
Each template row shows the event that triggers it, who receives it, and whether it's currently active. Use the toggle in the Action column to turn a template on or off, the eye icon to preview it, and the pencil icon to edit its content. Merchants can also see when a template has been updated at the system level, instead of only seeing their own edits. They can also send a test email to preview exactly what a recipient will see .
Email Configuration (Sending Domain & SMTP)
The Custom Email Domain and Notifications lets Shipturtle marketplaces send emails from their own branded domain instead of a generic sender address. It ensures consistent brand identity across order updates, vendor notifications, and customer communications. With reliable delivery and customizable notifications, this add-on enhances trust, professionalism, and overall communication experience.
There are 3 ways:
Default- ShipTurtle domain, standard sender name(Less preferred)
Brand- less preferred
SMTP-most preferred
Shipturtle defaults to its Email service provider for sending emails from the app. However, it's advisable to set up your own Mail Service within Shipturtle to control blocked domains and achieve a better sender score.
Steps:
1. To begin, go to Settings -> Integrations -> Email configuration
2. Click on Custom email setup and choose your Driver.
Below are the steps for configuring SMTP or your own Gmail account:
Step 1:
Enable 2-factor authentication for your Gmail account. Confirm this at https://myaccount.google.com/security.
Step 2:
Generate an App Password by visiting https://myaccount.google.com/apppasswords. Then Generate the password. Remember, once you close the page, the password will be inaccessible for security reasons. Ensure to copy it before closing.
Step 3:
Configure SMTP in Shipturtle using the app password created above.
Driver: SMTP
Password: The generated app password
Outgoing server: smtp.gmail.com (if using Gmail)
Port: 465 or 587
Encryption type: SSL or TLS (If you use port 465 then use SSL and if you use port 587 then use TLS)
Enter the remaining details accordingly.
Note: You can only save these details after sending a test email. Until then, the save button will be inactive.
Note: While using your own mail address, Gmail has a daily sending limit for each user account. This limit is in place to prevent spamming. When you exceed this limit, Gmail will block further email sending attempts and return an error message.
Below are the steps for configuring SMTP or your own Microsoft account:
To enable access for SMTP in Microsoft environments like Microsoft 365 or Office 365, follow these steps:
1. Check Admin Center Settings (For Office 365 and Microsoft 365 Users)
If you're using Microsoft 365 and are an admin, you may need to enable SMTP access for individual mailboxes.
- Log into the Microsoft 365 Admin Center:
- Go to admin.microsoft.com and log in with your admin credentials.
- Navigate to the User Settings:
- Go to Users > Active users.
- Find the User’s Email Settings:
- Select the user for whom you want to enable SMTP access.
- In the user’s settings page, go to Mail > Manage email apps.
- Enable Authenticated SMTP:
- In the Manage email apps section, ensure Authenticated SMTP is checked. This setting allows the user to send email using SMTP.
- Save Changes.
2. Ensure Modern Authentication is Enabled
If you’re using an application that requires basic authentication, be aware that Microsoft is moving to deprecate basic auth in favor of Modern Authentication (OAuth 2.0). However, if you specifically need SMTP, you can enable it at the user level as shown above.
To enable Modern Authentication:
- Go to Settings > Org settings in the Microsoft 365 admin center.
- Select Modern Authentication under the Services tab.
- Enable Modern Authentication if it’s not already enabled.
3. Generate an App Password (For Two-Factor Authentication)
If the account uses Multi-Factor Authentication (MFA), standard passwords won’t work for SMTP access. Instead, create an App Password:
- Go to security settings for the account.
- Select Additional security options and find the App Passwords section.
- Generate a new app password.
- Use this app password in place of the regular account password for SMTP authentication.
4. Whitelist SMTP in Mail Flow Settings (If Restricted by Organization Policies)
If your organization restricts SMTP by default, you may need to configure Mail Flow settings:
- Go to the Exchange Admin Center at admin.exchange.microsoft.com.
- Select Mail Flow > Rules.
- Check for any rules that block SMTP connections and either modify them or add an exception for the specific user or application.
- After following these steps, SMTP should be accessible for the configured users or applications in your Microsoft environment.
Check Test email
Navigate to Settings -> Integrations -> Mail Logs to confirm the successful or failed delivery of the test email.
If you’re stuck, reach us at team@shipturtle.com or open a ticket on the support page.