A seller registration page lets prospective vendors sign up to your marketplace directly from your storefront. You generate an embeddable registration form in Shipturtle, paste it into a Shopify page template, and link that page from your store navigation. Use it so vendors can apply on their own instead of contacting you to be added manually.
Who this is for
- Merchant: You generate the form, embed it in Shopify, and publish the page.
- Vendor: Prospective vendors fill in the form to apply to your marketplace.
- Customer: Not applicable.
Before you begin
- You need access to your Shopify theme code and the ability to create pages and edit navigation.
- Decide which fields and branding you want on the form before you generate it, so you embed it once.
Merchant setup
Generate the registration form
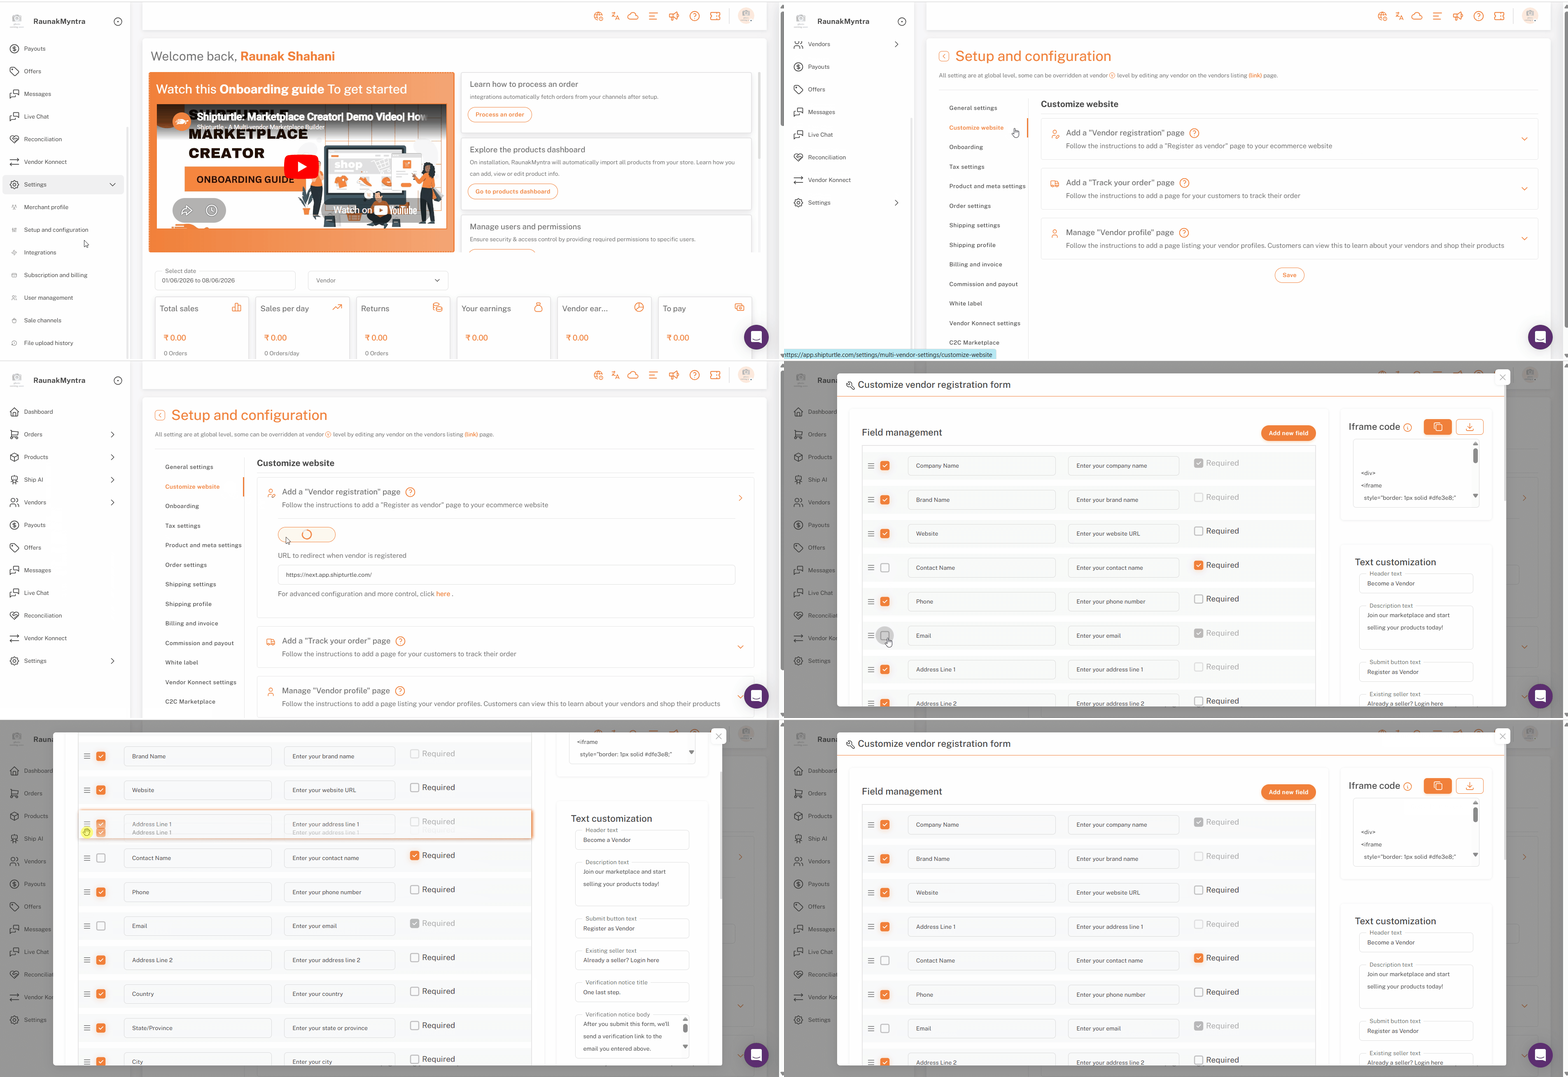
- Open Settings → Setup & Configuration → Customize Website and find Add a vendor registration page.
- Click Generate iFrame Code. A configuration window opens.
Configure the form
In the configuration window you can:
- Fields — choose which fields appear, and drag and drop them to reorder.
- Text — set the header, description, submit button text, and existing-vendor text.
- Branding — upload your logo and pick colors and fonts to match your store.
When the form looks right, save your changes and copy the generated code from the iFrame Code section at the top right. You can also download the code to keep for later.
Adding custom fields
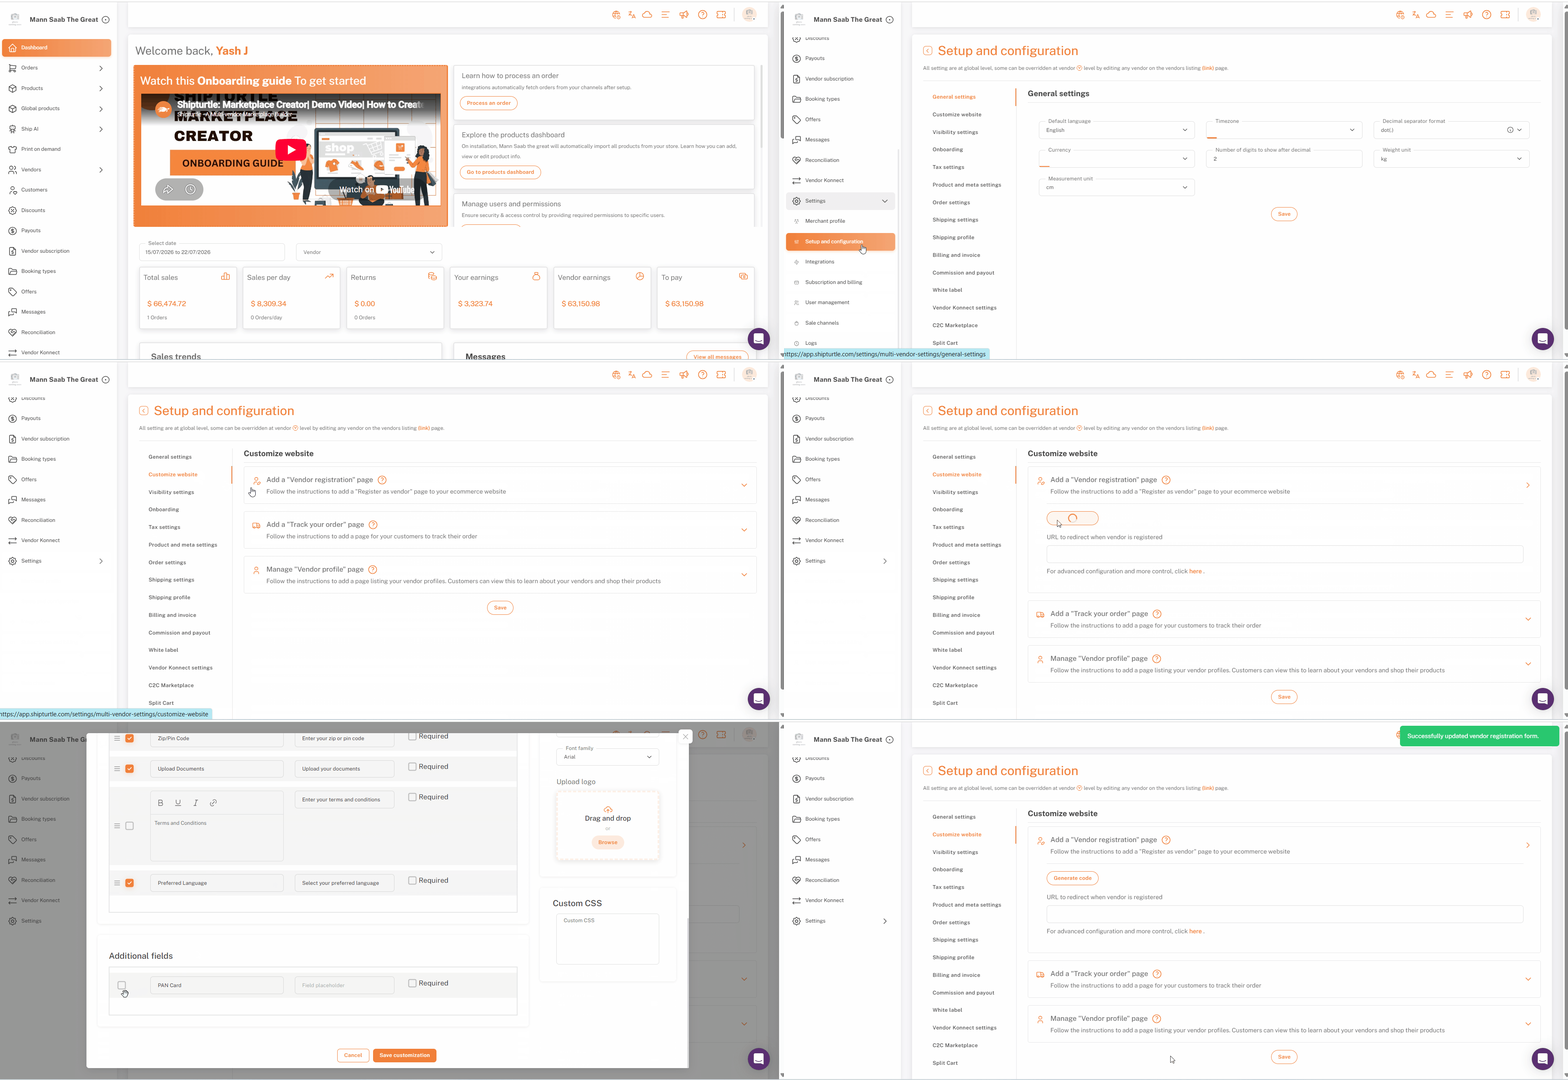
Many marketplaces need to collect vendor details beyond the default fields, business registration numbers, tax IDs, certifications, or other business-specific information.
Merchants can add custom fields to the registration form. This applies only to the iframe-based registration page, not the C2C registration form. Once a field is added, choose whether to include it in the Customized Vendor Registration Form, and the iframe code updates accordingly.
You should now have the embed code ready to paste into Shopify.
Email OTP verification
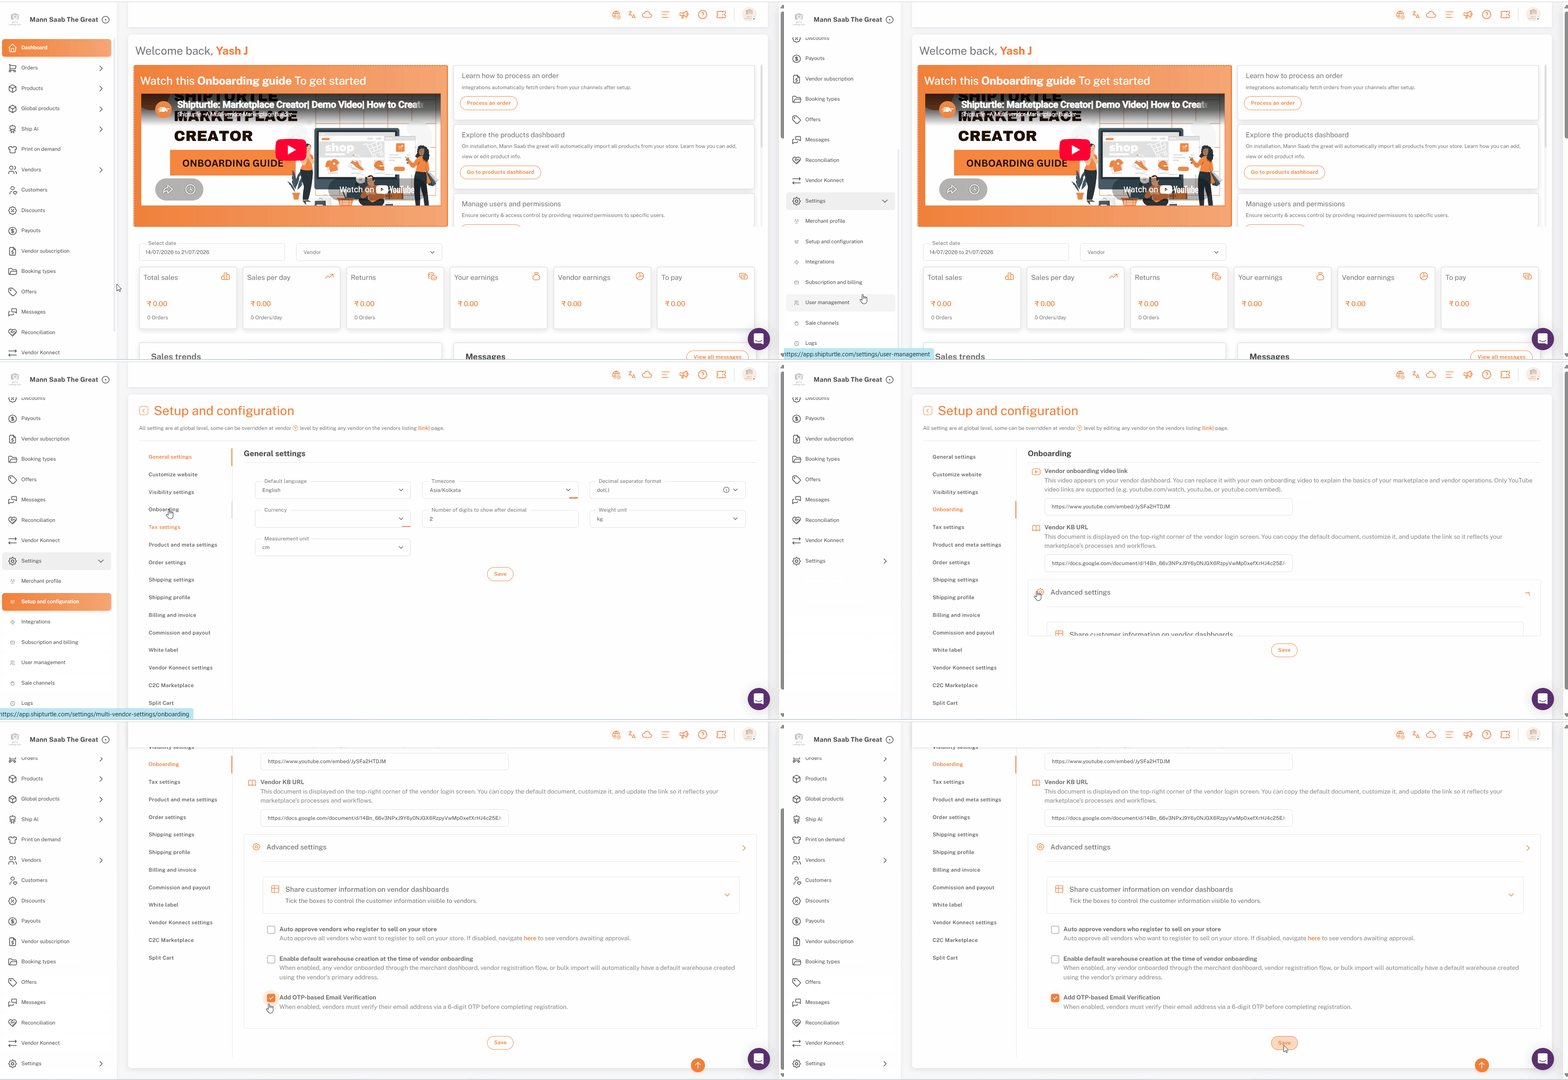
By default, anyone applying through this form must verify their email with a 6-digit OTP before their application goes through, helping prevent fake or spam applications. This is a separate, global setting, not part of the form configuration above.
To turn it off: go to Setup & Configuration → Onboarding → Advanced Settings, and toggle off Add OTP-based Email Verification.
Shopify configuration
The form is embedded as an iframe, so it lives in a Shopify page template that you create and then link from your navigation.
Create the page template
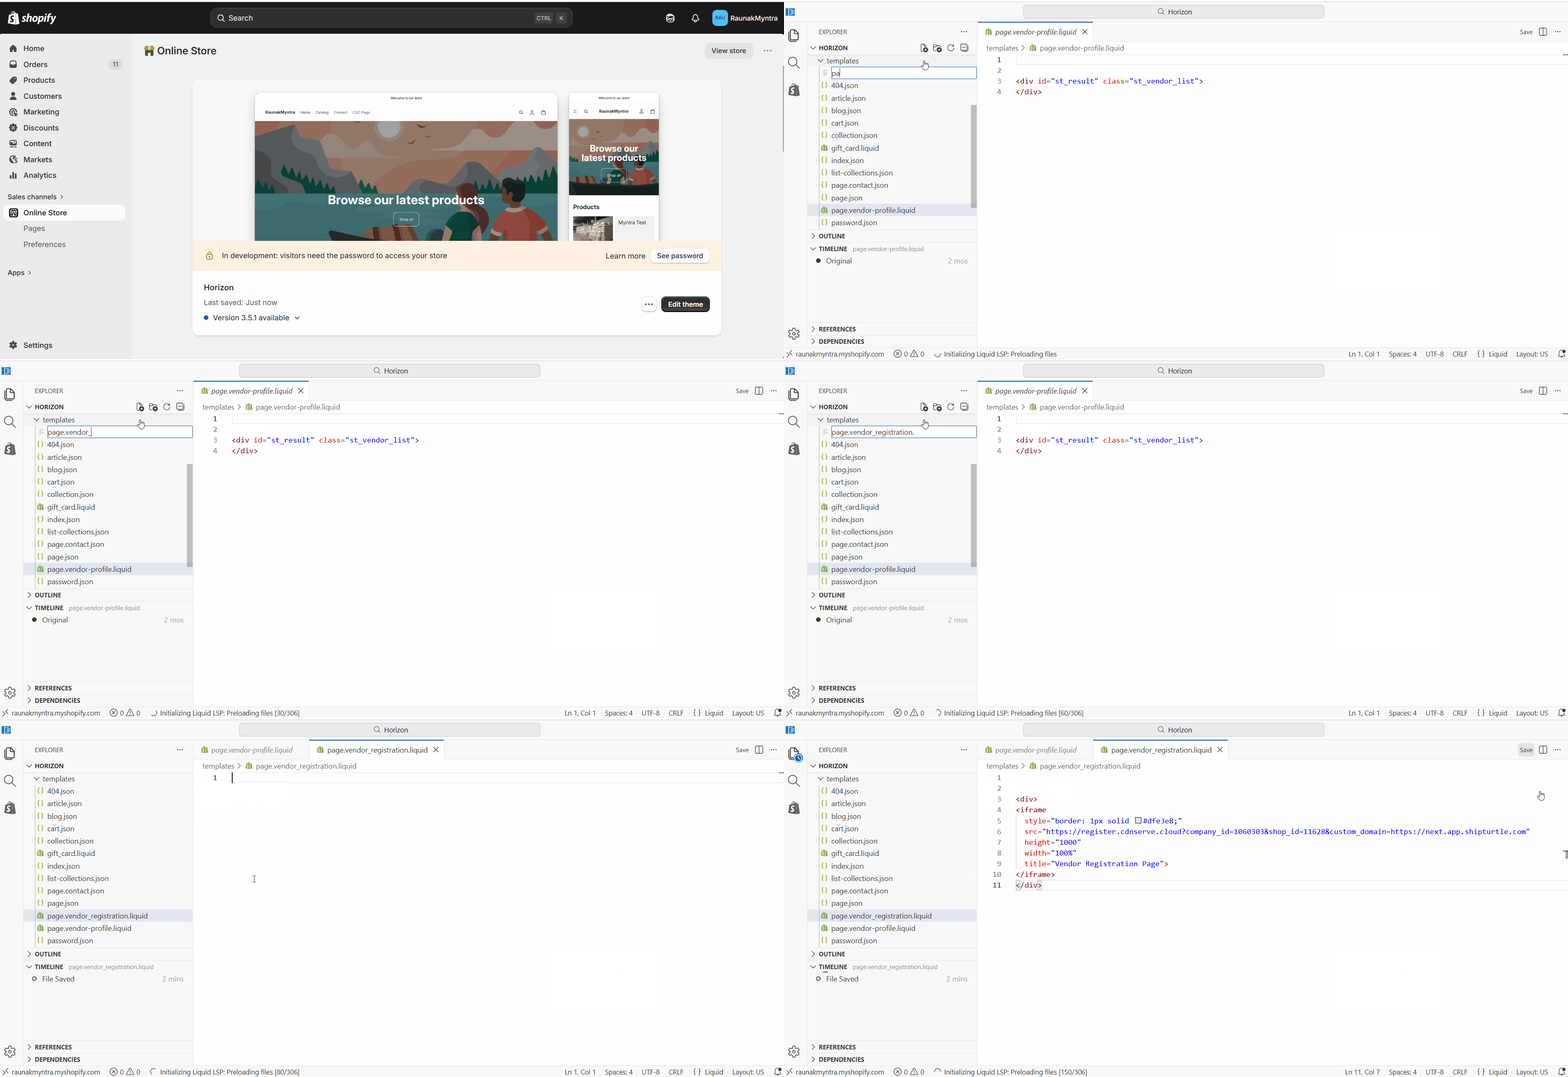
- In Shopify Admin, go to Online Store → Themes, click the three dots next to your theme, and select Edit code.
- In the left sidebar, click Add a new template.
- Set the template type to Page and the format to Liquid.
- Name the file following the format page.name.liquid — for example page.vendor_registration.liquid — and press Enter. Do not use spaces in the name.
- Paste the copied iframe code into the template and click Save.
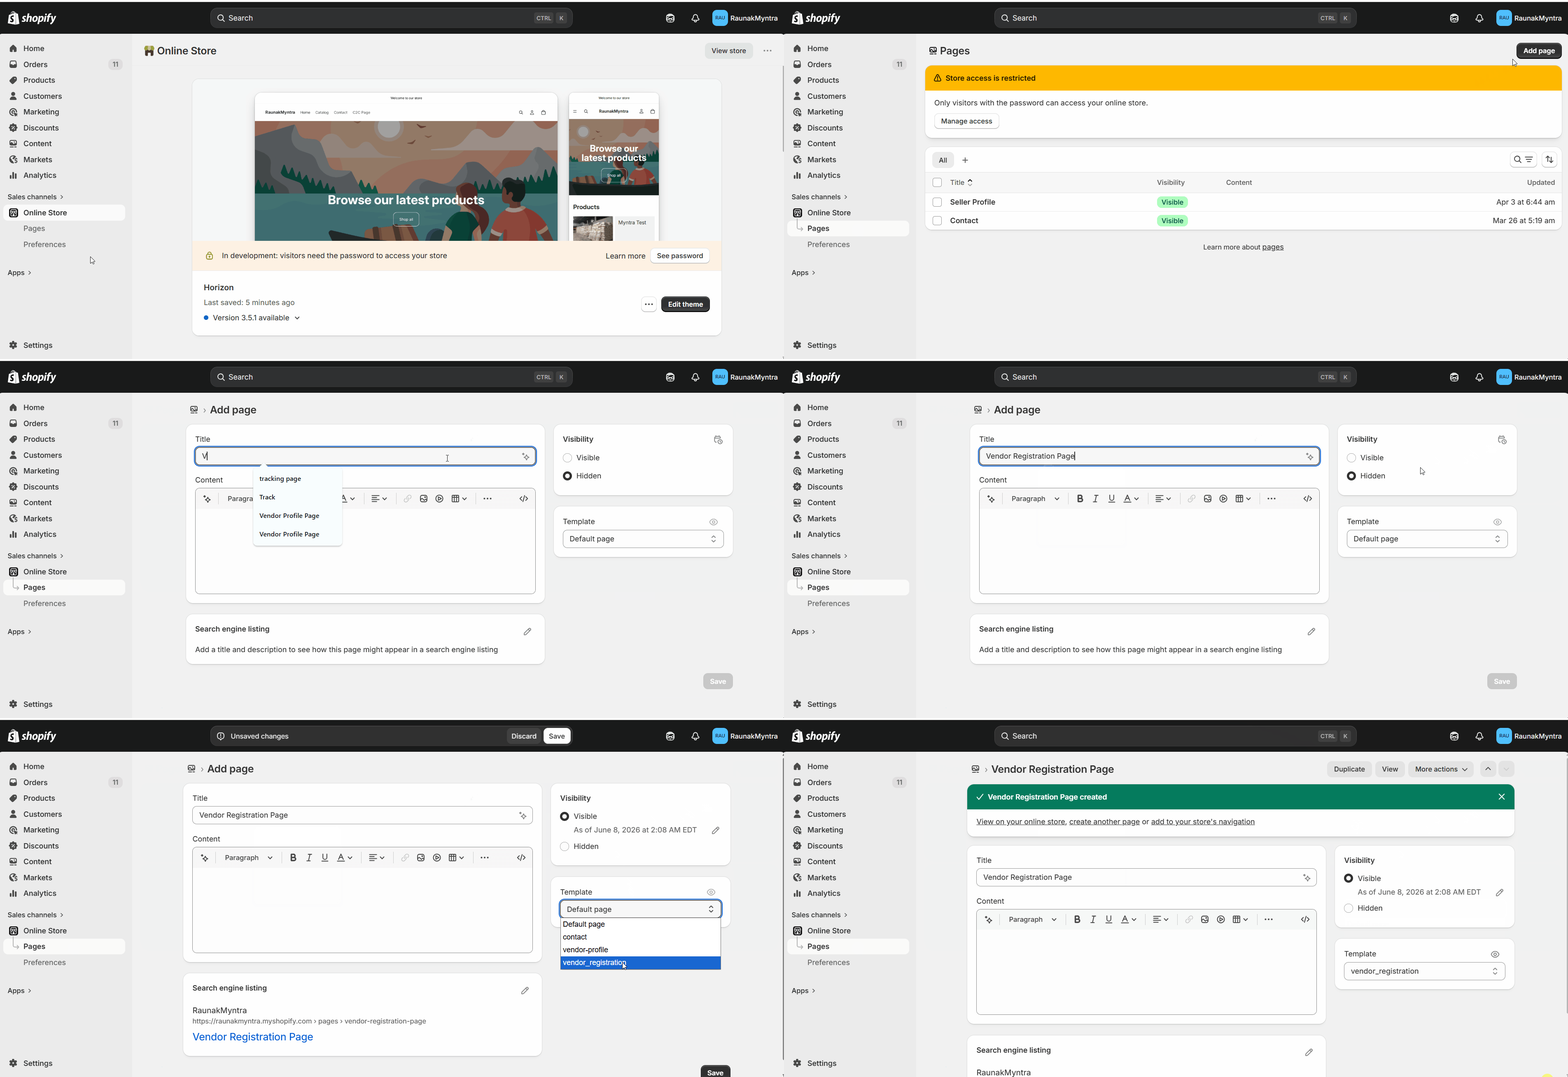
Create the registration page
- Go to Online Store → Pages and click Add page.
- Enter a title such as Sell with Us or Become a Seller.
- Set Visibility to Visible.
- Under Template, select the template you created (for example vendor_registration).
- Click Save, then click View to preview the live page.
Add the page to your navigation
- In Shopify Admin, go to Content → Menus.
- Open the menu where the link should appear, for example the main menu or footer menu.
- Click Add menu item, name it Sell with Us, and link it to the registration page you created.
- Click Save.
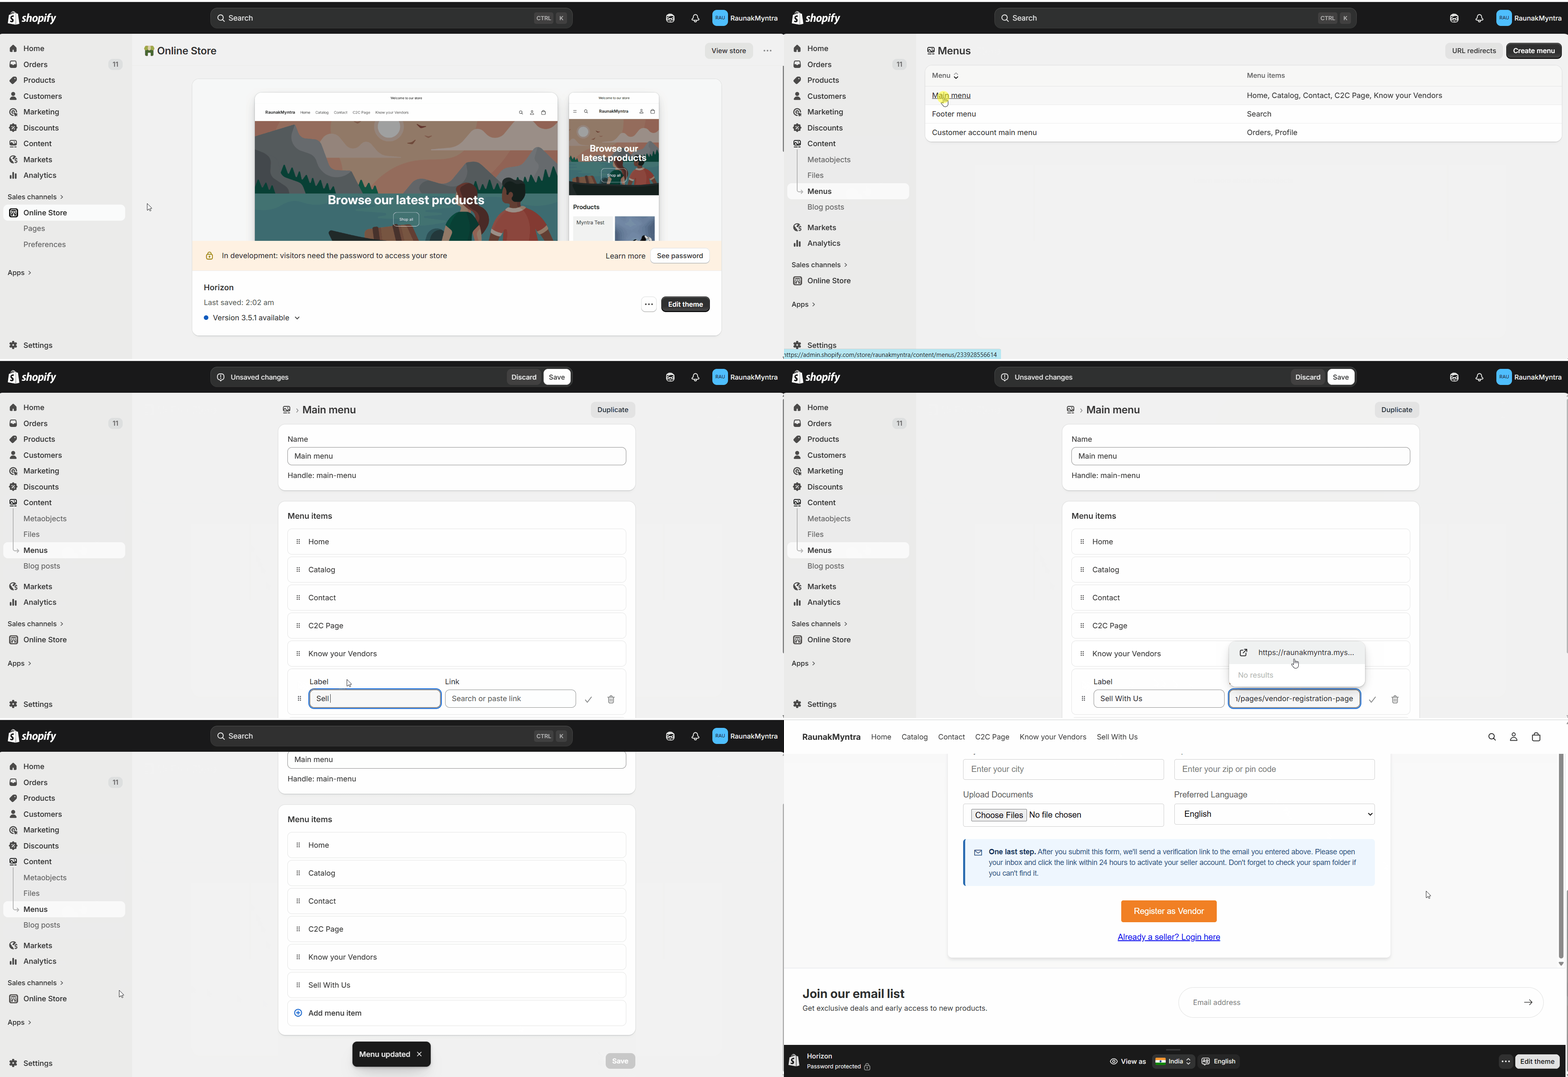
Your seller registration page is now reachable from your store navigation, and vendors can apply through it.
FAQs
Can I change the form fields after publishing? Yes. Reopen the form in Customize Website, adjust the fields, regenerate the code, and replace the code in your Shopify template. The page picks up the new form once saved.
Where do submitted vendor applications go? Applications come into Shipturtle for you to review, so you control which vendors are approved before they can list.
Can I match the form to my store's branding? Yes. Upload your logo and set colors and fonts in the form configuration before you generate the code.
Troubleshooting
The registration form does not show on the page. Confirm the page uses the VendorRegistration template and that the iframe code was pasted and saved in that template. A page left on the default template will not display the form.
The page is live but missing from the menu. Adding a page does not add it to navigation automatically. Create a menu item under Navigation and link it to the page.
Related articles
- Vendor profile page — give approved vendors a public profile on your storefront.
- Choose between B2C and C2C user interface — decide which dashboard new vendors land in.
If you’re stuck, reach us at team@shipturtle.com or open a ticket on the support page.